Single Posts is a very crucial segment for customizing every single post. Because this segment wraps with Single Posts Layout, enable/disable Post Meta, Post share icons, Related posts, column settings, and so on. So, to learn and customize the Single posts, let’s begin the topic.
How to change the Single Posts Layout?
First, run your WP Dashboard —> Theme Options —> Blog Options —> Single. And in there, you’ll find the Single Posts Layout and a box with a few options, such as Content – Primary Sidebar, Primary Sidebar – Content, No Sidebar, Full Container, etc. So, make the Single Posts Layout you desire.

How to disable/enable the Post Meta on Single Posts?
First, go to your WP Dashboard —> Theme Options —> Blog Options —> Single. And in there, you’ll find the Posts Meta and a few options, such as Avatar, Author Name, Posted Date, Comment Count, Categories, and Tag. So, hit the boxes to disable/enable the Posts Meta.

How to disable/enable the Next and Previous post?
First, go to your WP Dashboard —> Theme Options —> Blog Options —> Single. And in there, you’ll find the Next and Previous post with an On/Off button. So, click “On” to enable the Next and Previous post.

How to show the Featured Image and disable/enable the Social Share Links on Single Post?
First, go to your WP Dashboard —> Theme Options —> Blog Options —> Single. You’ll find the Featured Image on Single Post with an On/Off button in there. So, hit the button to “On” to show the Featured Image on Single Post.
Second, go to your WP Dashboard —> Theme Options —> Blog Options —> Single. And in there, you’ll find the Social Share Links with an On/Off button. So, click “Off” to disable the Social Share Links.

How to disable/enable the Related Posts and Column settings?
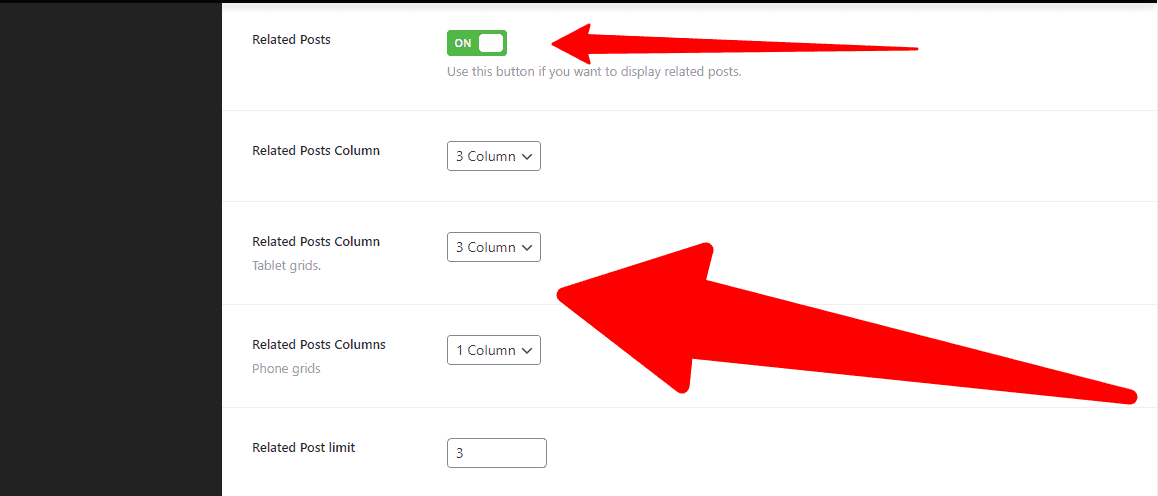
First, go to your WP Dashboard —> Theme Options —> Blog Options —> Single. You’ll find the Related Posts with an On/Off button. So, click “On/Off” to enable/disable the Related Posts.
Similarly, you’ll find the Related Posts Columns (Desktop grids, Tablet grids, and Phone grids) and Related Post limit with their respective buttons. So, make the customization you desire.

How to create Ads/Google AdSense and disable/enable to show AdSense before or after post?
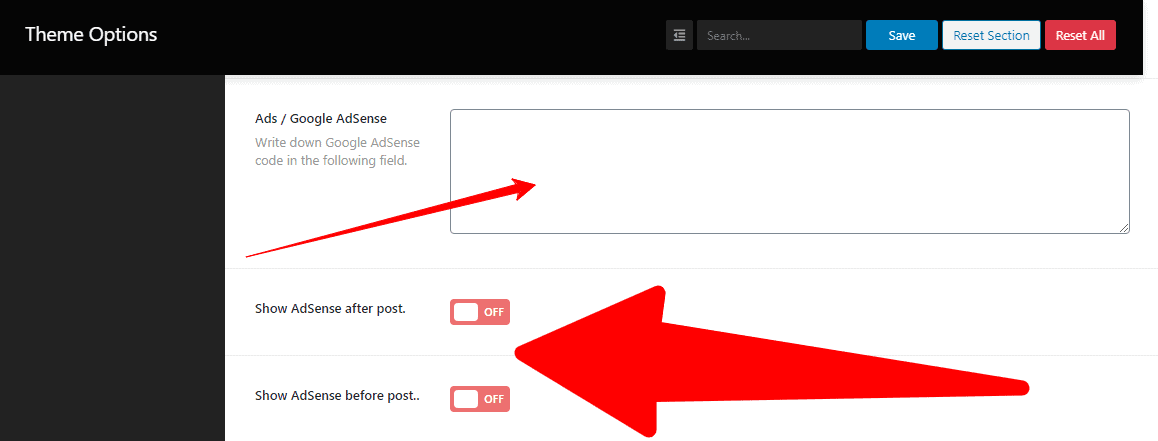
First, go to your WP Dashboard —> Theme Options —> Blog Options —> Single. You’ll find the Ads/Google AdSense with an empty box. So, write there for your Ads/Google AdSense.
Similarly, you’ll find the Show AdSense after post and Show AdSense before post with their respective On/Off button. So, click “On/Off” to enable/disable your Ads/Google AdSense you desire.
