The Header section will teach you how you’ll change its layout, background, navigation icons, and social profile. Along with you’ll get to know how you’ll change its main menu, typography, and color schemes.
How you’ll change its layout, background, navigation icons, or add a social profile?
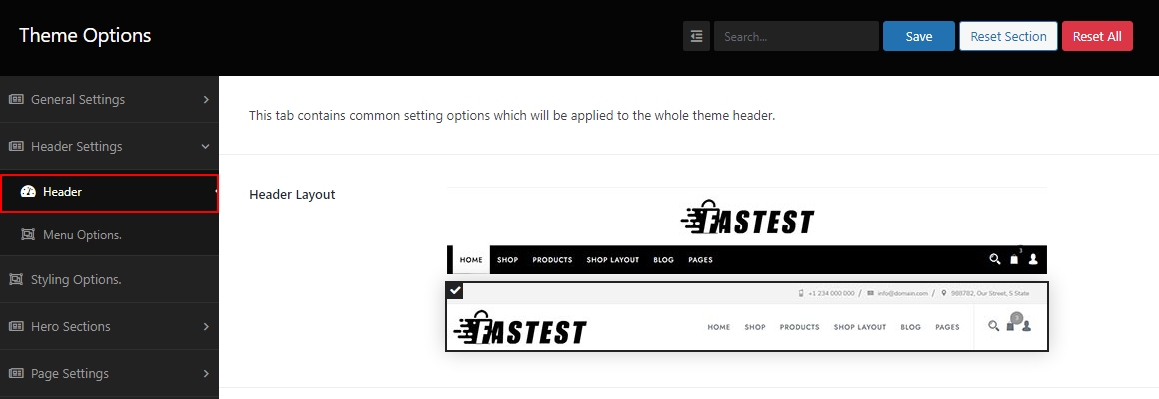
First, go to WP Dashboard —> Theme options —> Header Settings —> Header Option to change the Header layout. And in there, you’ll notice the Layout option with its one unique layout. So take that what you want.
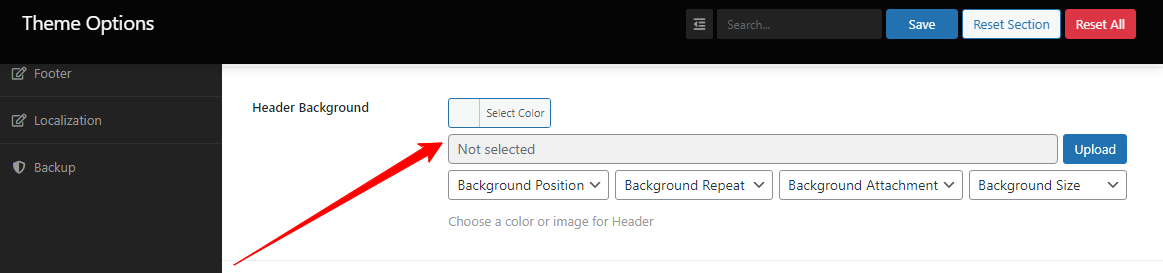
Second, on the same very address, you’ll find the (WP Dashboard —> Theme options —> Header Settings —> Header) Option to adjust the background. And in there, you’ll notice the Header Background with its several options. So, modify it how you want to improve.
Third, in the exact location (WP Dashboard —> Theme options —> Header Settings —> Header), you’ll get the option to use nav icons. And in there, you’ll notice the Navigation Icon with few icon names. For example, Product Category, Product Wishlist, Product Compare, and Social Icon. So click those icons you want to display.
![]()
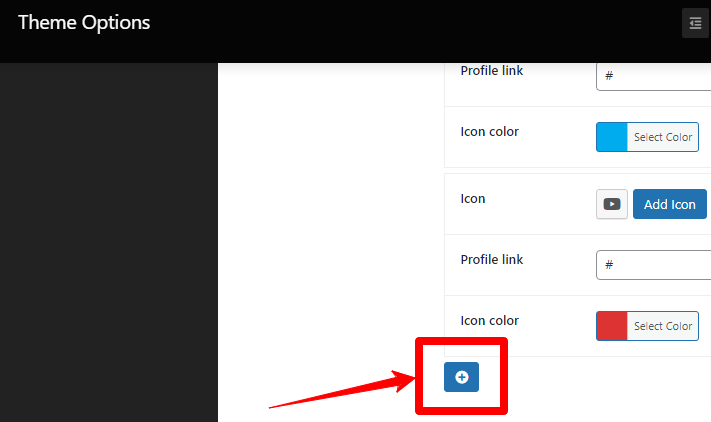
Fourth, to add a social profile, go in the same direction (WP Dashboard —> Theme options —> Header Settings —> Header) to control the option to add one or more. And in there, you’ll notice the Social Profile segment with three unique options. Fill those options to add your social profile.
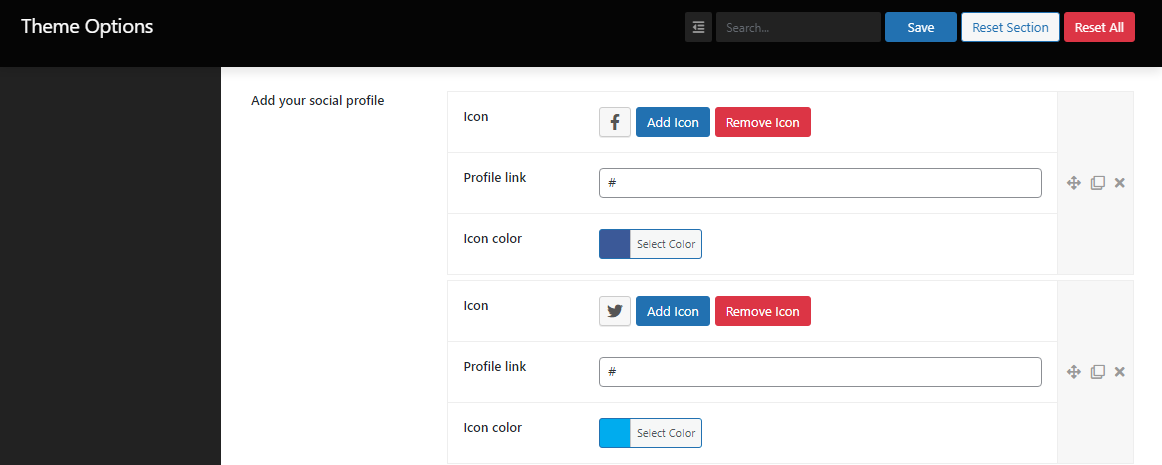
And to add more social profiles, stay on that above location (WP Dashboard —> Theme options —> Header Settings —> Header). You’ll see an Add button at the bottom of the page, so click it to add more.
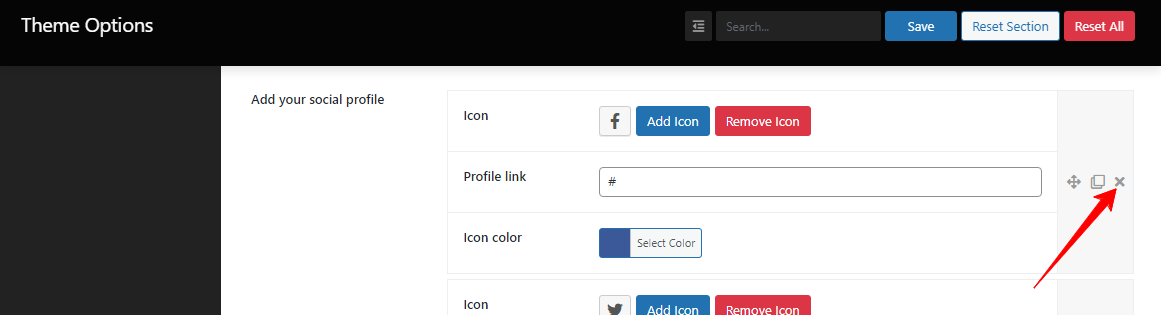
Plus, to remove social profiles, you’ll have the close button on the right side of your every social profile link. So, click the close button.
The Navigation Settings segment is a list of links for displaying vital info. It gives the site formation and serves visitors to find what they are searching for with ease. Hence, it’ll explain how you’ll make the Menu Name, Add Menu Items, and Display location.
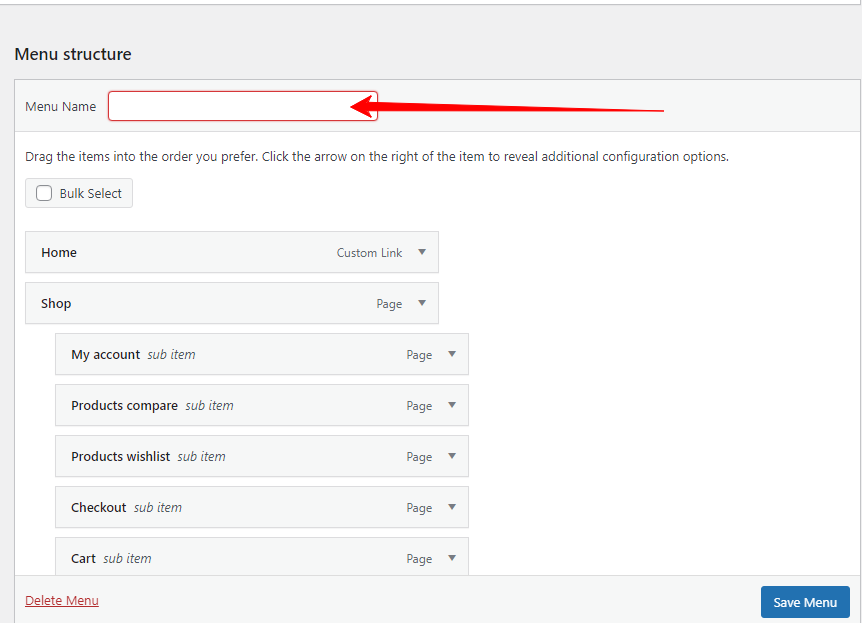
First, go to the WordPress Dashboard —> Appearance —> Menus. And in there, you’ll notice the Menu Structure —> Menu Name with an empty box. So, define your Menu Option and hit the Save Menu button.
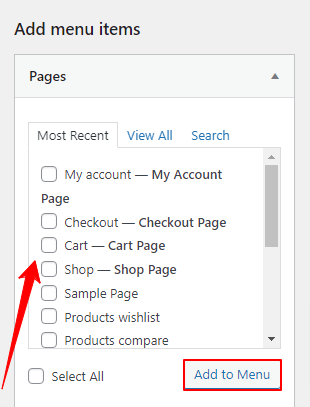
Next, on the very exact location, you’ll notice the (WordPress Dashboard —> Appearance —> Menus) Option to Add menu items. And in there, you’ll find the My Account Page, Checkout Page, Cart Page, Sample Page, and many more. So, pick from these options that you need, and then hit the Add to Menu button.
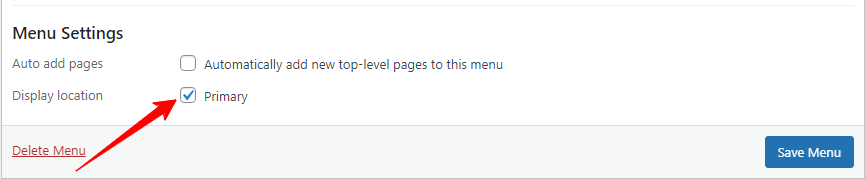
At last, run again in that direction (WordPress Dashboard —> Appearance —> Menus) Option for Menu Settings to Display location. And in there, you’ll notice the Display location with a clicking option. So, tick that option and click the Save button to add the Display location.