A navigation menu is a list of links showing vital sections of a website. It provides your site formation and helps visitors gain what they are looking for. It’s very comfortable to add menus and sub-menus in Fastest WordPress Shop. This step-by-step guide will show you how to add a navigation menu with ease.
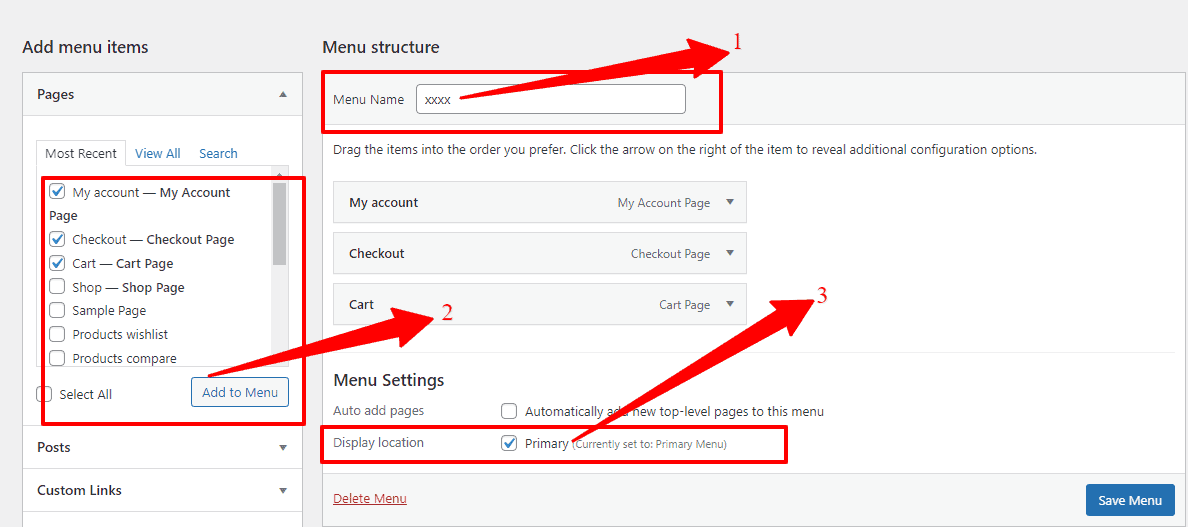
First, go to your WordPress Dashboard —> Appearance —> Menus. And in there, you’ll see the Menu Structure —> Menu Name with an empty box. So, name your Menu Option and click the Create Menu button.
Second, find the Add menu items. And in there, you’ll see My Account Page, Checkout Page, Cart Page, Sample Page, and so on. So, click on these options that you need, and then click the Add Menu button.
Third, find the Menu Settings. And in there, you’ll see Display location with a clicking option. So, click the option. And at last, click the Save button to add Navigation Menu.
How to add the Menu Icon and Tooltip Background Color?
First, go to your WordPress Dashboard —> Appearance —> Menus. And in there, you’ll find the Menu structure with lots of options. Like, Home, Shop, My Account, Checkout, Cart, and so on. Second, click any one of these options, and you’ll see the Menu Icon with an Add Icon button. Also, you’ll find the Tooltip Background Color with color box button options. So make it how you want to add/change the Menu Icon and Tooltip Background Color.
![]()
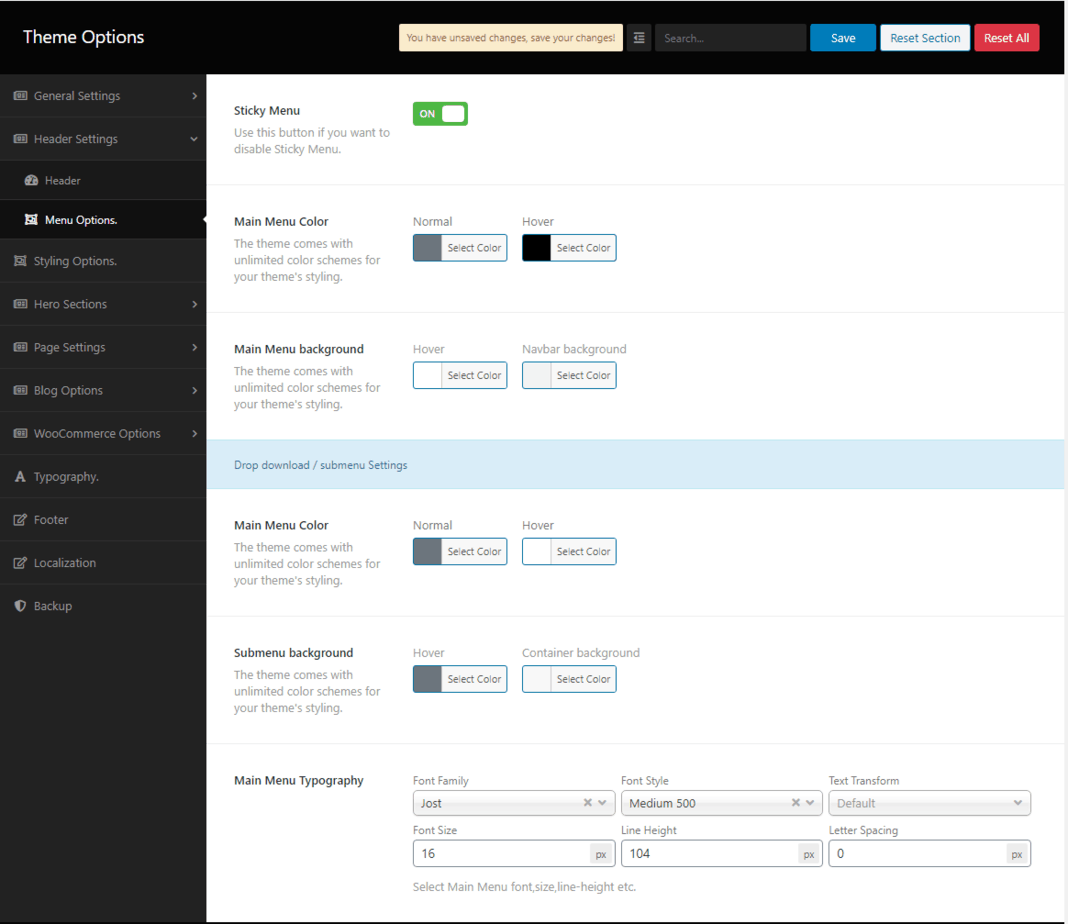
How to set up the main menu options?
Go to WP Dashboard —> Theme options —> Header Settings —> Menu Options to set up the main menu option. In there, you’ll see the Sticky Menu, Main Menu Color, Main Menu background, Submenu background, and Main Menu Typography, etc., with their respective options. So, click to set up the main menu options you want to show.