To clarify, it’s never easy for your site to appear and function just like the Grocery-Store demo. That’s why the Grocery-Store comes with a one-click demo importer option. Besides, to help you import demo content, we’re going to tell you two specific methods.
Method 1:- Demo Content Import Through One-Click:-
Please bear in mind that this option will only appear when you install and activate the requires or recommends plugin.
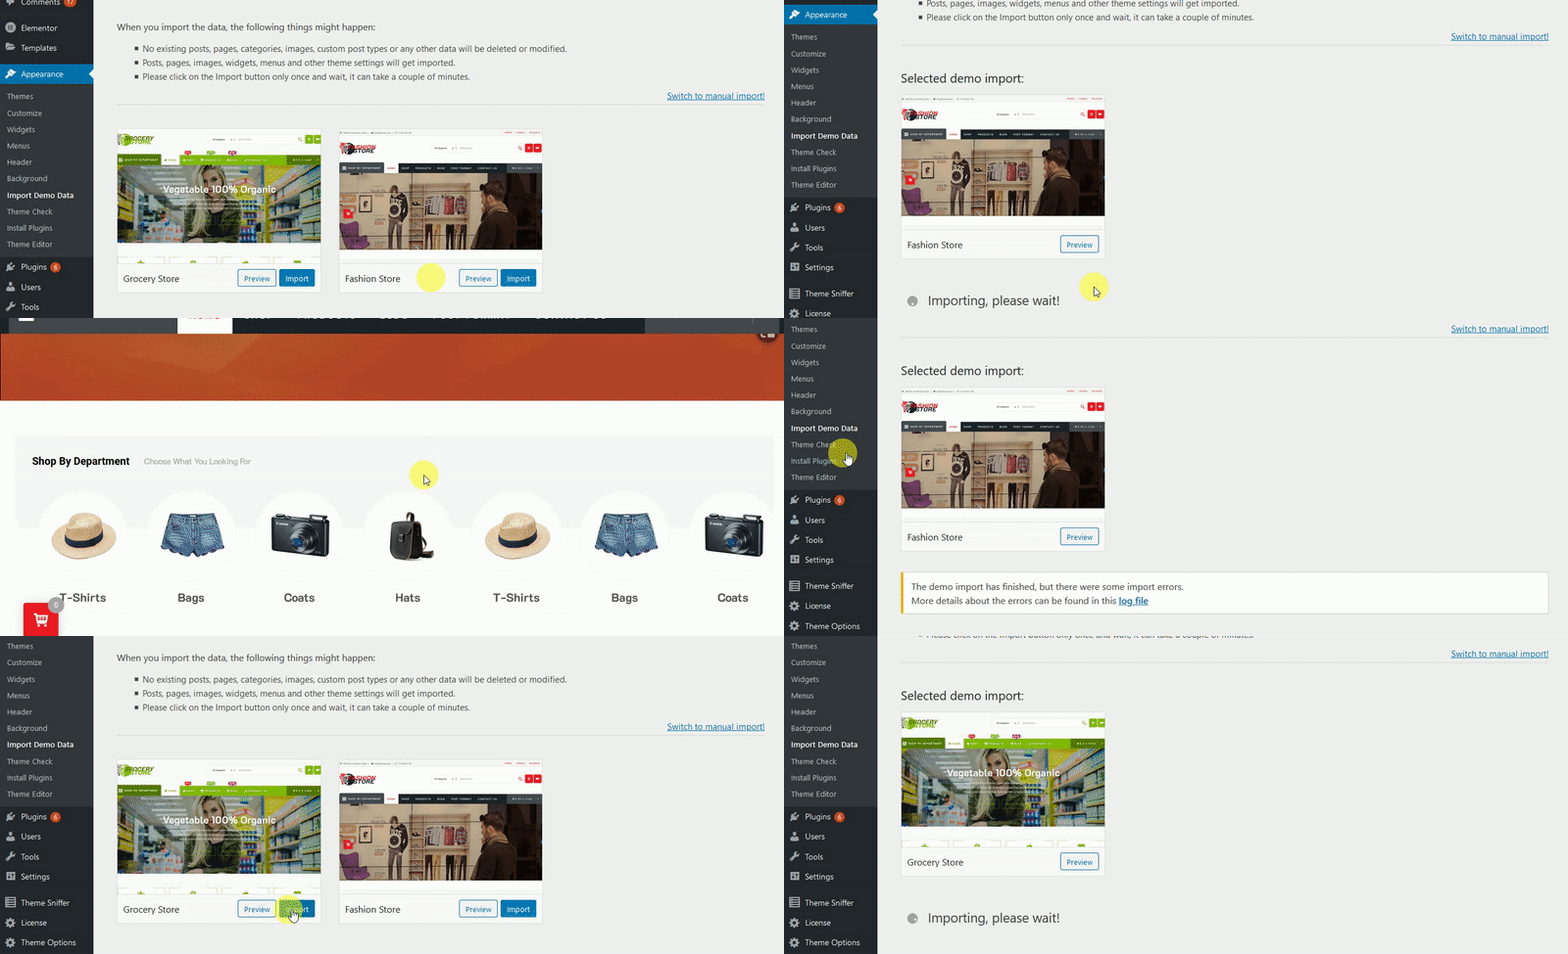
- Firstly, open your WordPress Dashboard —> Appearance —> Import Demo Content.
- Then, you’ll see the demo contents. So, choose the demo content you want to import and click the Import button.
- After that, your demo content will take a few (5-7) minutes to import, depending on your server and internet connectivity.

But, if you experience that the import is getting much longer than 5-7 minutes, it might be a problem. So, learn about how to change the max memory limit or 500 Internal Server Error.
Method 2:- Demo Content Import Through WordPress Tools:-
-
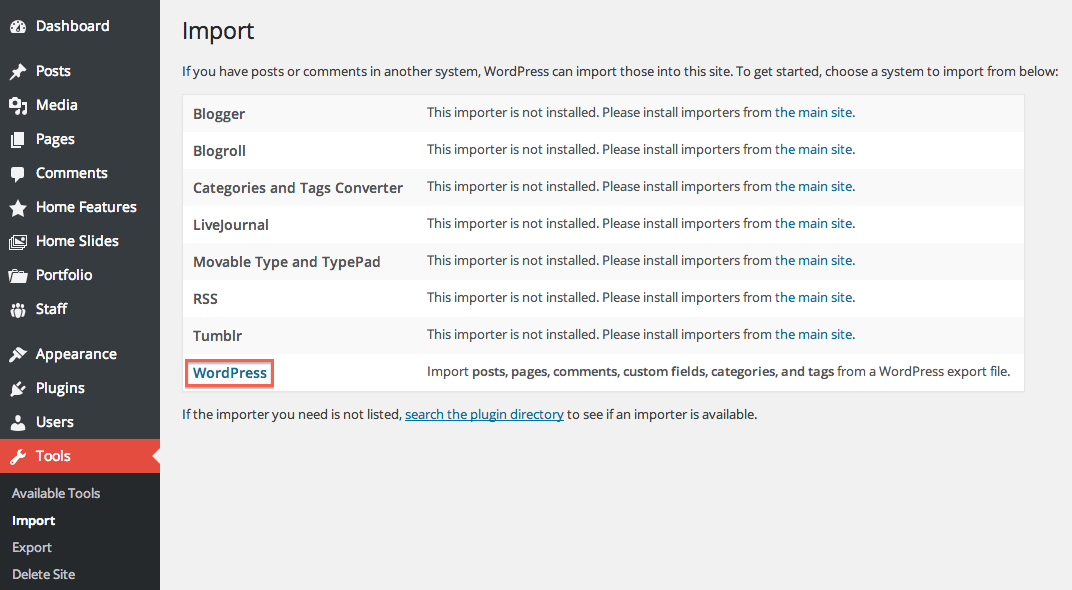
- First of all, open WordPress Dashboard —> Tools —> Import.
- Then, choose and click the WordPress option among the list and follow the instructions.

- After that, upload your demo content .xml file.
- Next, you’ll ask to map the authors in this export file to users on the blog. And also, for an individual author, you would choose to map to an existing user on the blog or to create a new user.
- Afterward, you’ll have the opportunity to import attachments images and media. So, click the “Download and import file attachments” box.
- Now your Posts, Pages, product, and Menus are imported. So, you’ll require to select the menu a theme location, and you’ll need to configure widgets.
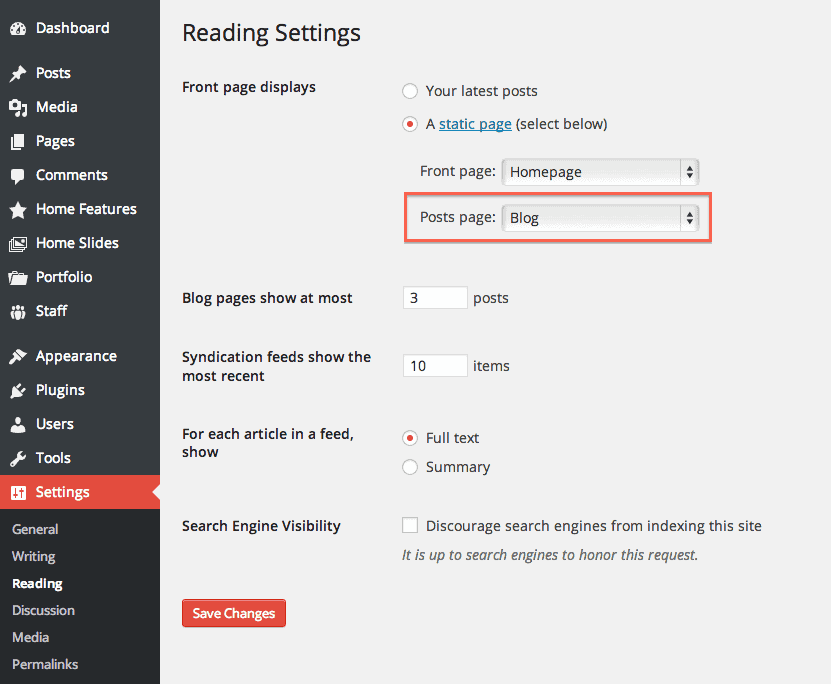
- And at last, you’ve to select the static home and blog page.
