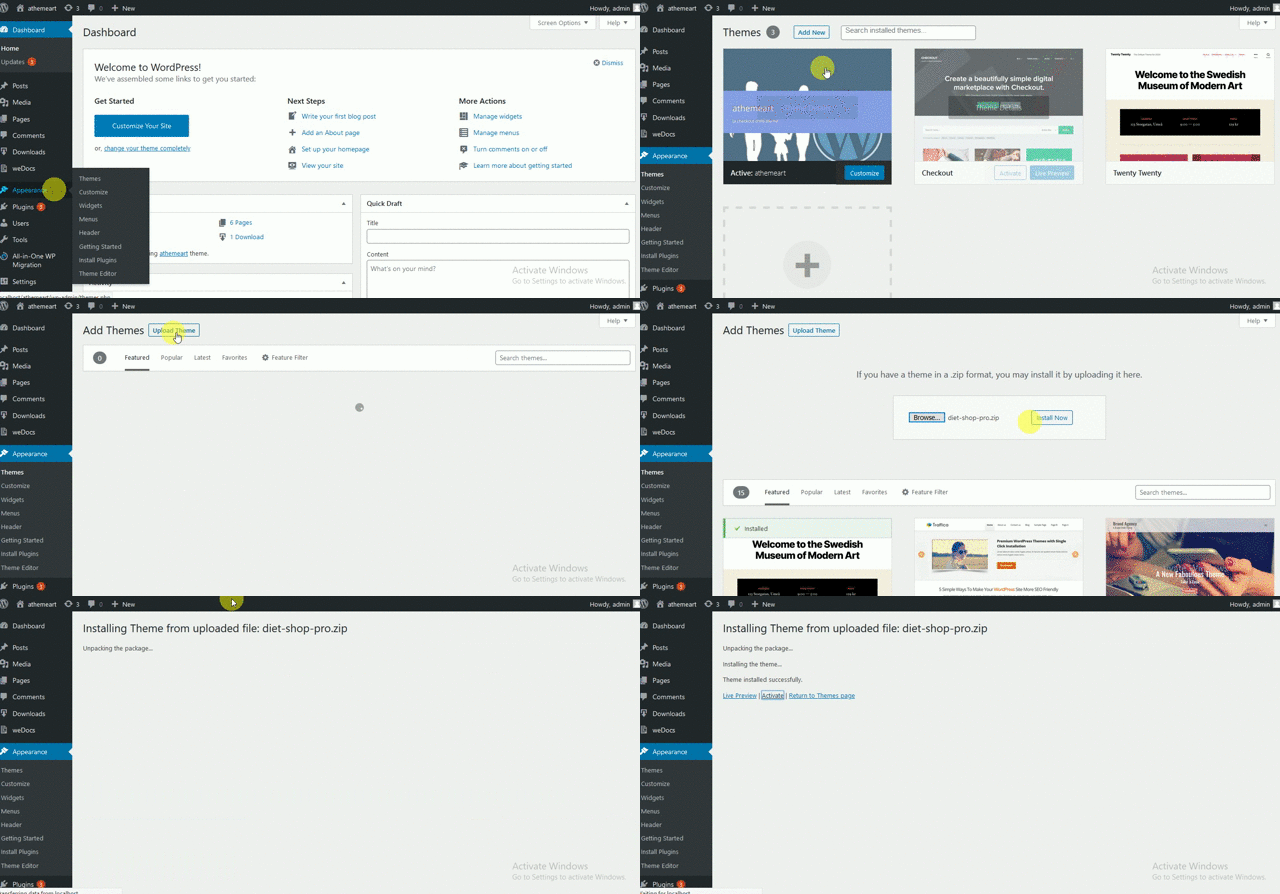
There are two doors to install a WordPress theme – manually with an FTP client, or automatically through the WordPress upload feature. Here you will discuss both options.
Installing a Theme with the WordPress Upload
- Theme installation process is same as others.
- Download the .zip file. ( downloaded from https://www.athemeart.com/customer-login/ .)
- Log in to your WordPress dashboard and navigate to Appearance → Themes.
- Let’s Click on the Add New button.
- Just below the headline, you will see a link that says Upload – click that.
- Click the browse button and find the theme .zip file from your local machine and then click the Install Now button.
- After successfully installing the theme click “Activate Theme”.

Installing a Theme via FTP Upload
- Download the theme zip file to your local machine and unzip it.
- Log onto your server through an FTP client, and find your site’s wp-content/themes directory. You have to transfer the entire theme folder to that directory.
- Log in to your WordPress dashboard, and go to Appearance → Themes. There you will see screenshots of the themes that are ready for you to use. Click on the theme title (or theme screenshot) for the theme you wish to begin. A preview of the theme will be displayed, and then you can click the Activate link in the top right of the show window.
Troubleshooting Possible Errors
If you encounter the message “Are you sure you want to do this? Please try again.” or “The link you followed has expired” when attempting to install, this is most likely occurring because your server has a low maximum file size upload/low maximum execution time set in the PHP settings. You must increase the following PHP settings to be greater than 24M (Any reputable hosting company will assist you with this quickly & hassle free):
- upload_max_filesize – greater than 24M
- post_max_size – greater than 24M
- max_execution_time – greater than 100
or you can upload the theme through FTP instead to bypass this all together.