A navigation menu is a list of links that helps visitors easily access key sections of your website. It provides structure and enhances user experience. Adding menus and sub-menus in Fastest WordPress Shop is simple. Follow this step-by-step guide to create a navigation menu effortlessly.
- Go to WordPress Dashboard → Appearance → Menus.
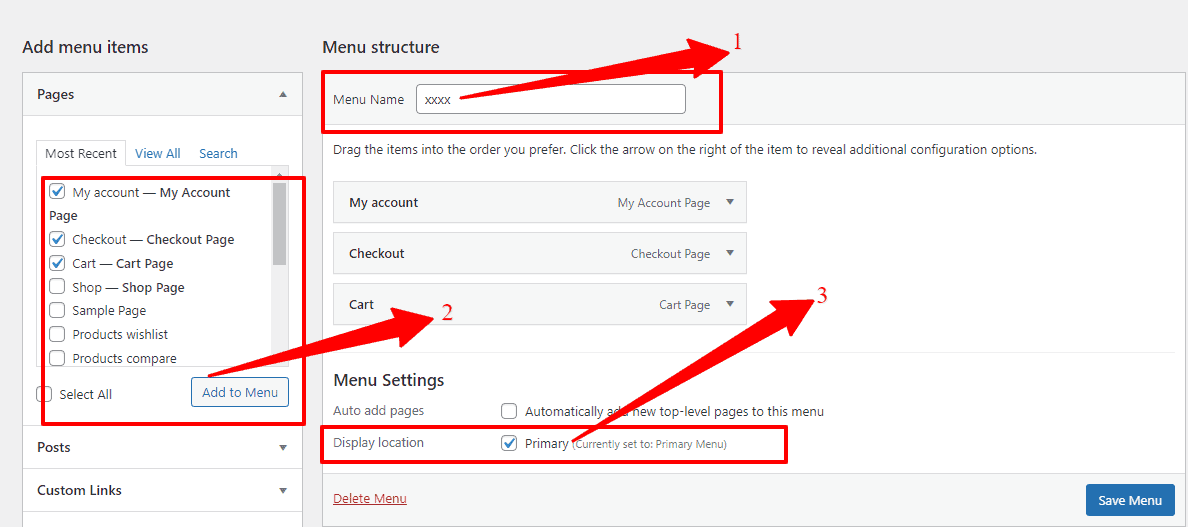
- Under Menu Structure, enter a name for your menu and click Create Menu.
- In the Add Menu Items section, you’ll see options like My Account, Checkout, Cart, Sample Page, etc.
- Select the pages you want to include and click Add to Menu.
- Under Menu Settings, choose where you want the menu to appear.
- Click Save Menu to finalize your navigation setup.
Your menu is now ready to enhance your site’s navigation! 🚀
How to add the Menu Icon and Tooltip?
First, navigate to WordPress Dashboard → Appearance → Menus. Here, you’ll find options for a custom icon picker, text input, and background settings, as shown in the screenshot below. Simply update the settings with your preferred data to customize the menu with tools and icons of your choice.
![]()
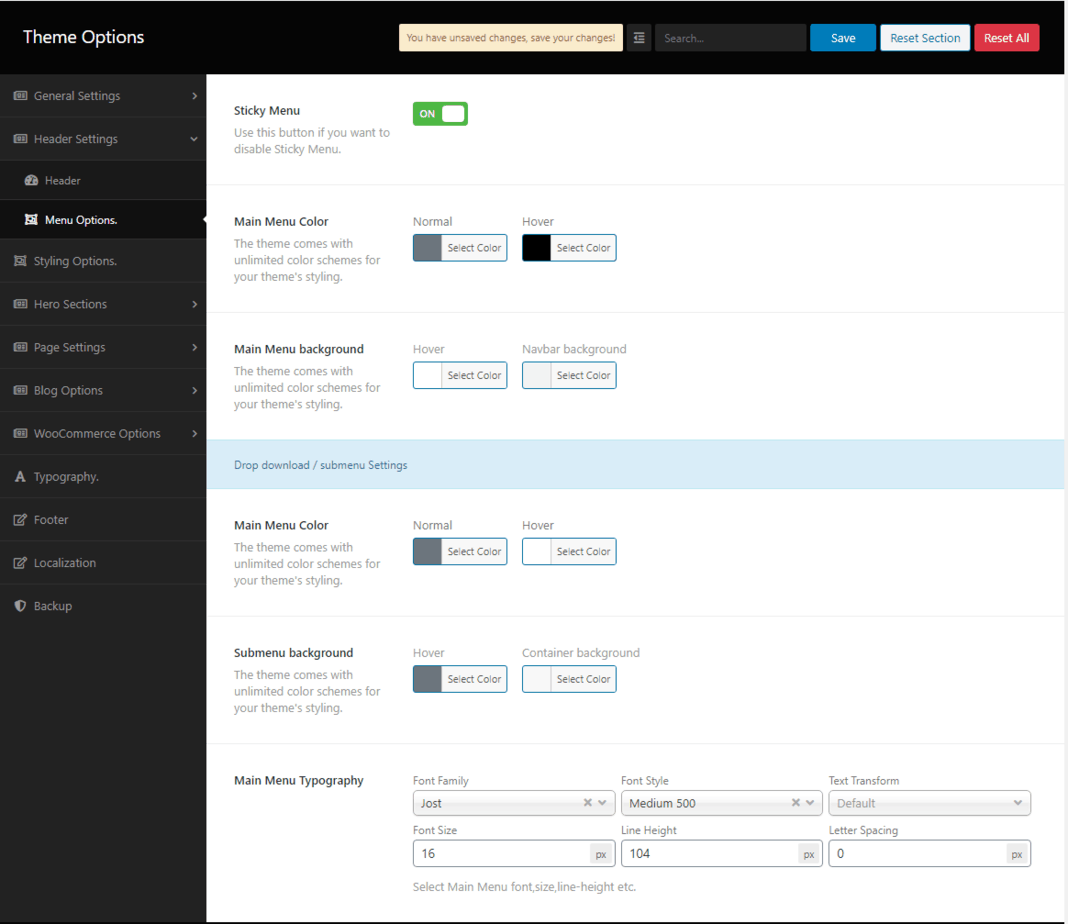
How to set up the main menu options?
Go to WP Dashboard → Theme Options → Menu Options to configure your main menu settings. Here, you’ll find options for Sticky Menu, Main Menu Color, Background, Submenu Background, Main Menu Typography, and more, as shown in the screenshot below. Simply adjust these settings to customize your menu display.