A navigation menu is a collection of links that highlights important sections of your website. It organizes your site and makes it easier for visitors to find what they need. Adding menus and sub-menus in BC Consulting is a straightforward process. Follow this guide to quickly set up a navigation menu.
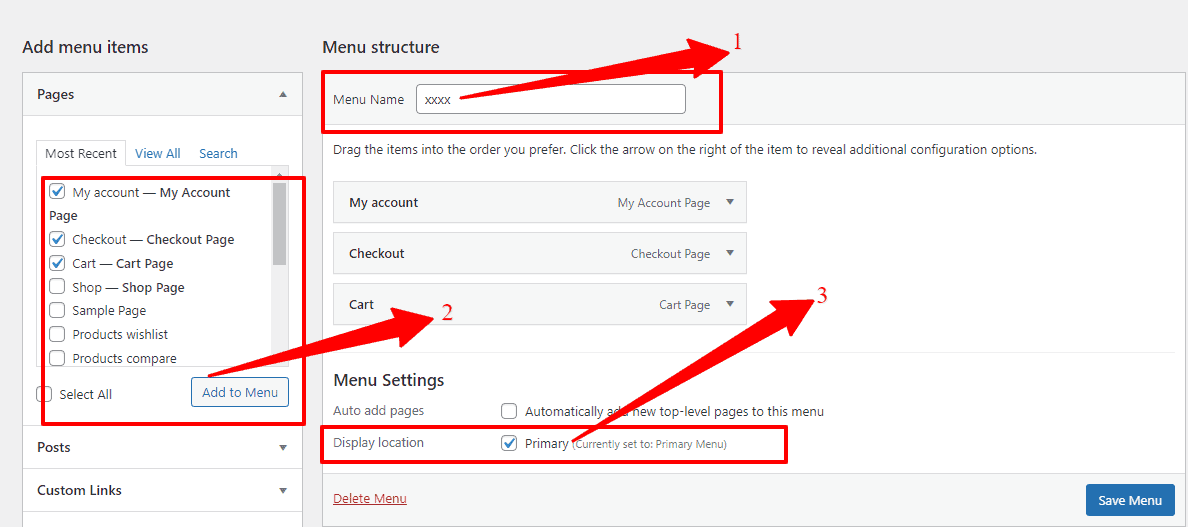
First, navigate to your WordPress Dashboard. From there, go to Appearance → Menus. In the Menu Structure section, you’ll see an empty field labeled Menu Name. Enter a name for your menu and click the Create Menu button.
Next, locate the Add Menu Items section. Here, you’ll find options like My Account Page, Checkout Page, Cart Page, and Sample Page. Select the items you want to include and click the Add to Menu button.
Finally, go to Menu Settings, where you’ll see a Display Location option. Select the desired location for your menu, then click the Save Menu button to finalize your navigation menu setup.
And learn how to update the main menu’s color, fonts, and other settings, click here.
How to Set Up One-Page Navigation
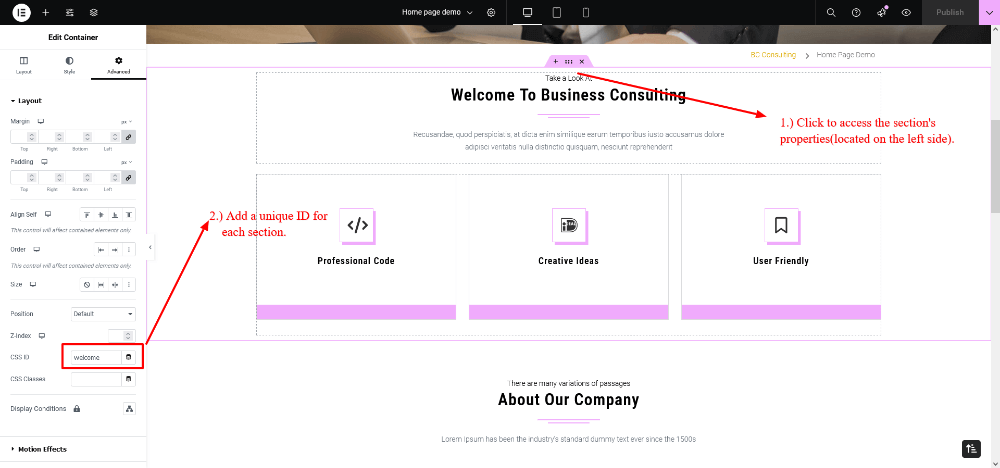
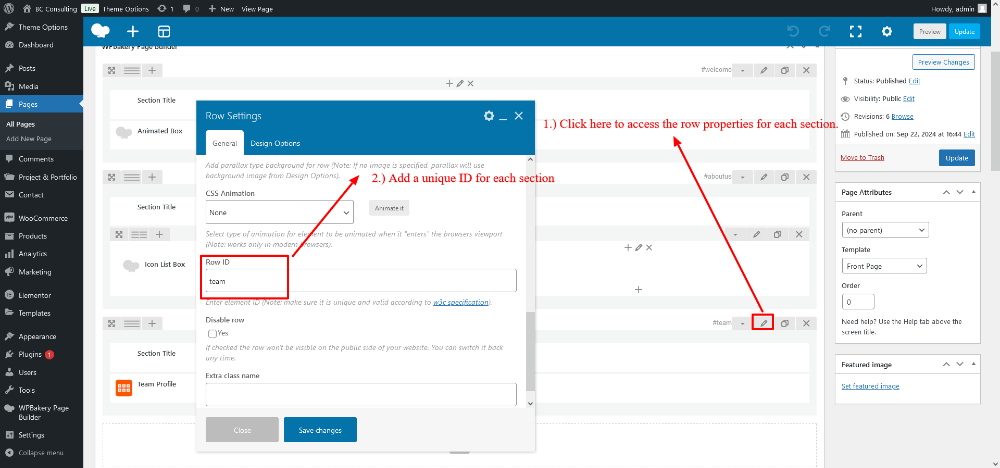
After designing your page layout and sections using Elementor or WPBakery, you can assign a unique ID to each section. To do this, go to the page editor and add a unique ID to every section, as shown in the screenshot below!
Elementor:
WPBakery:
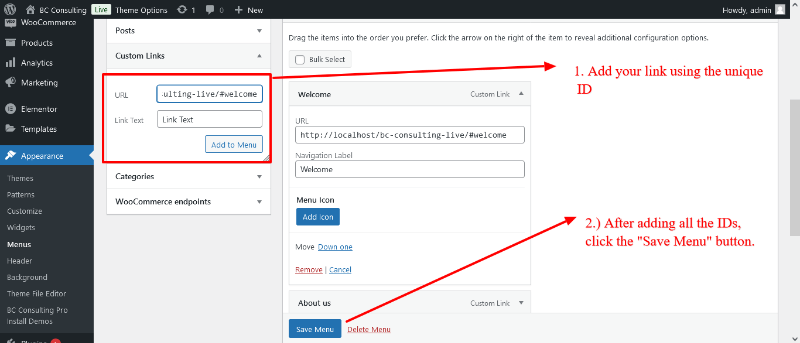
After adding all the section IDs, assign each ID to the corresponding menu item as shown in the screenshot below.